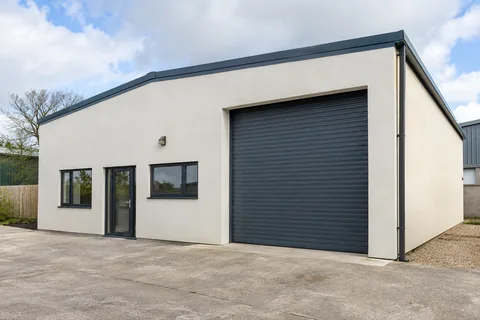
Fine texture, specified as a system
Silicone Rendering Warrington | Fine Exterior Finishes
Silicone rendering is commonly discussed as a finish choice, but the visible coat is only part of the wall system. The background, preparation, base layers, reinforcement and junction details determine what can be installed beneath it. Begin with the wall and its condition, then choose a compatible system with the texture and colour you want. A bucket label on its own is not a complete specification for the work.

On this page
Understand what is being offered
The term can describe a thin-coat decorative render within a manufacturer's system. It is also sometimes used loosely when discussing a silicone-containing paint or other coating. Those products do different jobs. The quotation should name the actual finish and explain whether the proposal includes a new reinforced base, treatment of existing render or a coating over a retained surface. That distinction makes comparisons much easier and prevents a cosmetic treatment being mistaken for replacement of a failed background.
It also separates this option from monocouche rendering, which is a different render family, and from a render colour change on an otherwise suitable wall. Material descriptions should be specific enough to identify the manufacturer's instructions and the intended texture. Avoid relying on words such as premium or weatherproof without an explanation of the construction. The proposal needs to show why the complete arrangement suits the masonry, existing layers and exposure of the particular elevation.
- Sound background A background accepted by the specified system. Keeping old render requires a system-specific assessment of its bond and condition.
- Beads Corner, stop and base beads set the edges and straight lines.
- Basecoat with mesh Glass-fibre mesh embedded in the basecoat resists cracking.
- Primer Where the system requires it, tinted towards the finish colour.
- Silicone finish A thin, through-coloured, water-repellent coat that forms the texture.
Wall on the left, finish on the right. Not to scale: coats, thicknesses and primers follow the chosen manufacturer’s system and the condition of the wall.
Preparation should be visible in the scope
Before a decorative finish is applied, the supporting surface has to be suitable for it. A new wall, an old painted wall and a recently repaired elevation do not begin in the same condition. The inspection should establish what can remain and identify contaminants, weak layers or defects that affect adhesion. Where suitability is uncertain, specify the investigation or trial that will resolve it. A statement that the wall will be “made good” is too vague if substantial preparation could be required.
Isolated defects should be described separately from the general finish. The repair guide explains why the location and likely cause of damage matter. A new thin coat is not a substitute for investigating ongoing movement or a water source. Nor should a reinforcing layer be presented as a universal cure for every crack. The selected system and its supporting design determine how different backgrounds and changes of material are treated, including any joints that must remain expressed through the completed work.
| Proposal | What to clarify |
|---|---|
| New thin-coat render system | Preparation, base layers, reinforcement and named finish |
| Decorative coating on retained render | Evidence that the existing surface is suitable |
| Render over external insulation | Insulation design, fixings, interfaces and compatible finish |
Judge the grain as well as the shade
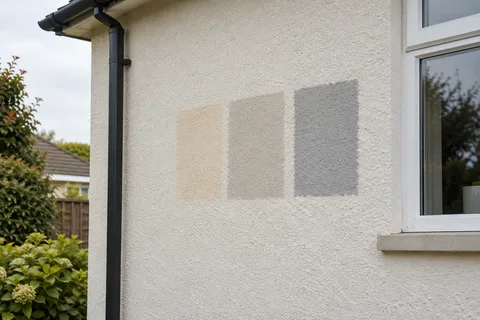
The same colour can look different on a fine texture and a coarser one. Grain size, the way the finish is worked and the direction of the light all influence its appearance. Use a physical sample large enough to judge those qualities, positioned near the windows, roofline and exposed masonry that will remain. A printed chart is useful for narrowing choices, but it should not carry the entire decision. A screen can alter both colour and the apparent smoothness of a surface.
If the house has a sheltered front and a bright open side, look at the sample in both situations. This does not mean the finish is changing colour; the surroundings and illumination affect what you see. Record the selected product, texture and colour reference so later substitutions are deliberate. Where an extension is being finished beside an older elevation, decide whether a close coordination or a clear contrast is intended. A new panel should not be promised to duplicate years of weathering on retained work.
Small fittings can create large interruptions
Plan the position of external lights, cameras, taps and other fittings before the new surface is completed. Existing items may need temporary removal, adjusted brackets or a different arrangement at the wall. The relevant trade should identify how penetrations and connections will be treated. Refixing equipment through a finished system without that planning can spoil the appearance and introduce avoidable weaknesses. Keep a simple list of what is removed, what is replaced and who is responsible for making each item operational again.
With external wall insulation, the fittings question becomes more involved because the completed face moves outwards. The designer needs to consider load support, service extensions and the relationship with openings and roof details. A silicone finish can be part of such a system, but choosing it does not establish the insulation design. Compare the complete insulated proposal with a render-only option if both are being considered. The amount of preparation and work around the edges may differ considerably even when the chosen colour is identical.
Application and future care belong in the decision
The programme should allow the contractor to follow the chosen manufacturer's application and drying requirements. Conditions at the wall, including shelter and exposure, matter more than a broad description of the season. Protection may need to remain between stages. Avoid treating a promised completion date as permission to ignore unsuitable conditions or rush the next layer. For a whole-house project, the sequence should also identify how adjacent areas will be completed without leaving arbitrary finishing breaks in conspicuous positions.
At handover, keep the product references and cleaning advice. A finish described as low maintenance still needs sensible inspection and care, particularly around gutters, joints and fittings. Any future damage should be assessed in the context of the installed system before a patch or coating is selected. The Warrington rendering pages explain related options when an existing finish needs attention. Keeping the original specification makes that later conversation more useful than trying to identify the material from its colour or a distant photograph.
Common questions
Is silicone render the same as silicone paint?
No. Product names can sound similar, but a decorative render finish and a paint coating have different roles. Confirm the named product and every included layer so the quotation describes the actual treatment being proposed.
Can it be put straight over painted pebbledash?
That cannot be assumed. The old covering, its bond, paint and background need assessment. The system manufacturer and contractor should establish an appropriate preparation and build-up, or explain why removal or another approach is necessary.
See housing and planning information for Warrington and nearby places, including the source and geography behind each figure.